Finished assembling the DSO138 Digital Oscilloscope
I will soon be embarking on the huge project of assembling a TTSH (Arp 2600 clone) but first I just had to finish this little box.
I will soon be embarking on the huge project of assembling a TTSH (Arp 2600 clone) but first I just had to finish this little box.
Here’s another little project I had been saving for a rainy (dark) day. Yesterday I brought out my soldering iron again and spend a bunch of hours putting together this little thing.
I can now use the Sonic Potions LXR drum machine to trigger up to seven simultaneous sounds on my analog gear. The sync in/out jacks allows me to either let the LXR send out a master clock or have it controlled by for example my Roland System-100 or the modular.
So I finished putting together this baby. Will try out some new ideas with my modular this weekend.

Winter is coming. To keep the inspiration flowing I have previously bought some kits that needs assembling. Something to keep me busy when it’s dark and cold outside. First up is this kit. Can you guess what it is?
Yesterday I got a little package from my favorite online shop Thonk. It was the DIY version of the 4ms Rotating Clock Divider. It’s a clock devision device for my modular. It will replace my Doepfer A160, which is cool but doesn’t fit all my needs.
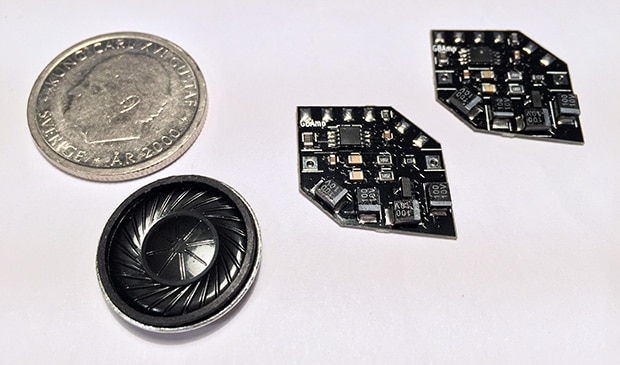
Two GBAmp3, one new speaker and swedish coin for size.
I haven’t grown tired of making chip music on my two Gameboys yet but one thing I have come to dislike is how quiet they are. Like, how in the world could kids hear anything on these things back in the day. It’s close to impossible to sit on a train with headphones and try to make music on it when there are people around talking.
I searched the net for a solution and found this little wonderful amplifier made and sold by Anton Veretenenko on Tindie. Not only does it bump up the volume a lot, but it also cleans away the high pitch noise. I bought one for each Gameboy and one new speaker to the Gameboy Color. I haven’t installed them yet but I will try to get it done this weekend. Stay tuned for sound examples.
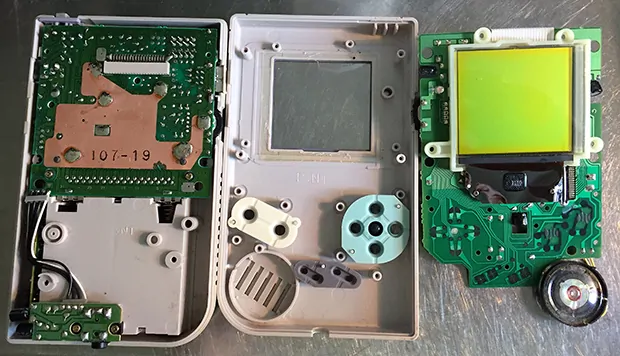
Today I got that special screwdriver I needed to be able to open up the Gameboy. The tool is called a Philips Triwing and it can be used to unscrew other Nintendo things as well. Alas my old original, yellowed Gameboy is now open and ready for some serious fixery.
I’m planning to do three things: Fixing the D-pad, fixing the dead pixels on the screen and soldering a new line-out to improve sound quality.
Update: The plastic thing under the D-pad was broken so I had to order replacement parts. While I wait for that to arrive from Hong Kong I decided to do the Prosound mod on my Gameboy Color instead. It was pretty simple and took maybe one hour and a half from start to finish. It sounds a bit better now so I will start to make some Nanoloop noises on it and upload to Soundcloud.

I was digging through my crates with old electronics and found my two old Gameboys, the original grey (now yellow) DMG-01 from 1989 and the newer Gameboy Color from 1998. I used them about 10 years ago when I had my latest chip tune phase. I also found the cartridge with Nanoloop 1.2. It still works but the battery on it must be going bad as all the old presets are gone.
The reason I used the old original Gameboy for Nanoloop was that the sound quality on it is better. It has less noise than on the Gameboy Color and a bit fuller sound as well. The screen however is pretty crappy so I used to do the tunes/noises on the Gameboy Color, which has a better screen and then record them from the original Gameboy.
When I turned on the original Gameboy today, first it didn’t go past the Nintendo logo. After doing the old magic “blow into the cartridge slot” technique I could get Nanoloop to start. Next two problems are 1: Only parts of the screen is working and 2: The joystick up and right doesn’t work. Lets see what can be done about that. The screen is easily fixed and I think the joystick is as well. Should be fun.
I’m also thinking about installing backlight mods on both Gamboys, but thats a project for another rainy day.
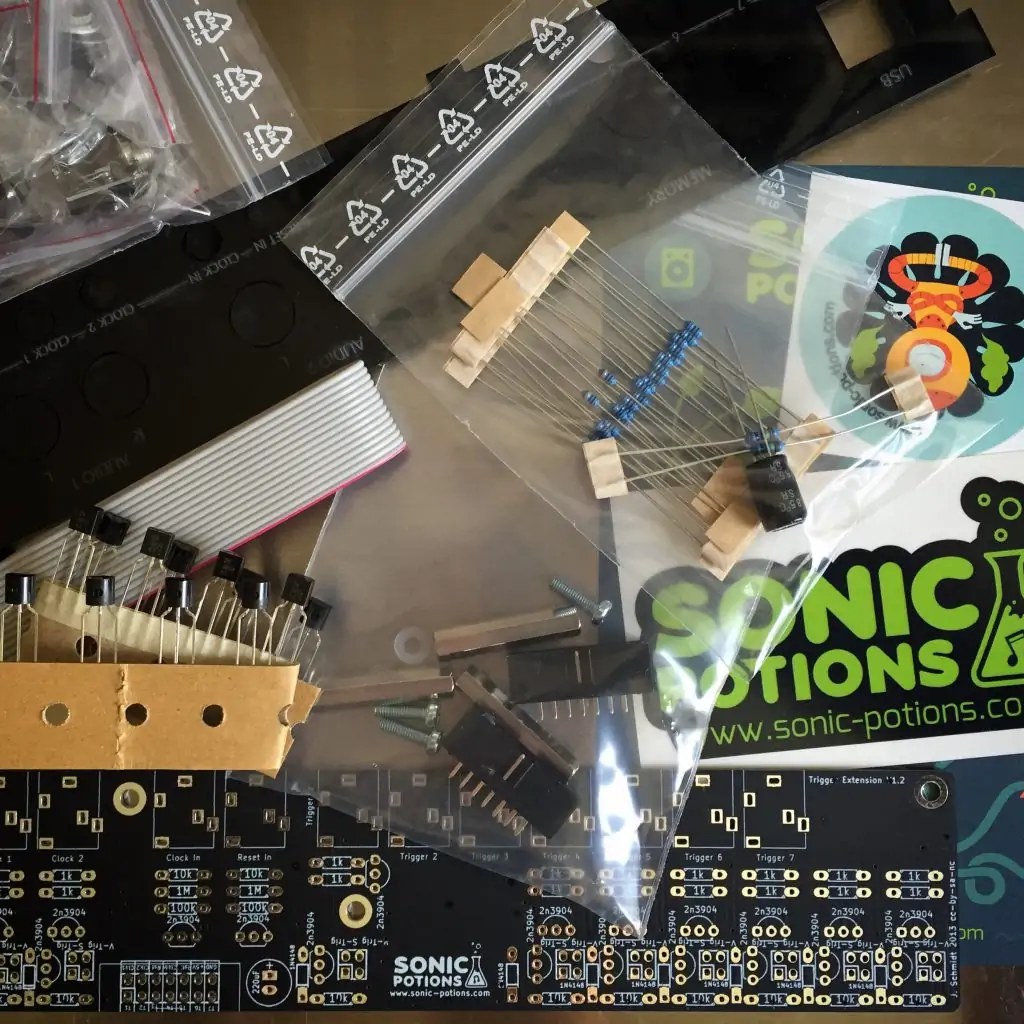
My next little project this summer will be putting together this little CV trigger i/o solution and adding it to my Sonic Potions LXR drum machine.
Then I will be able to use it with my modular and other analog equipment, like the Roland System-100 and Roland SH-09.

I had an old Intel Macbook from 2006 stashed away in my closet. Apple had more or less dropped all support for it a long time ago, so now it was pretty much useless. I couldn’t even run the latest version of Chrome on it anymore.
A couple of months ago I stumbled upon a video on Youtube with a step by step guide on how to install Windows 10 on these old laptops. I decided to refurbish my old Macbook. It looked pretty easy but I didn’t have the original disks for Snow Leopard and had to buy new ones from Apple. I also got a new 500 GB hard drive as the original was only 60 GB, too small to hold both Windows and OS X. The whole process was fairly straight forward and took about an afternoon and an evening, including installing all the updates for Windows.
Basically it went like this:
Now I had a fully working Windows 10 laptop for surfing the web and playing non-graphics intense games like Braid and FEZ.
Of course I couldn’t stop there. I decided to do something about that ugly top case. Since the laptop was first generation white Macbook, aka the smelly version the sides of the plastic had eroded into in thin long stripes. On top of that, the plastic smelled like old sweat, a heavy BO that got more intense the warmer the computer got. Apple quality my ass.
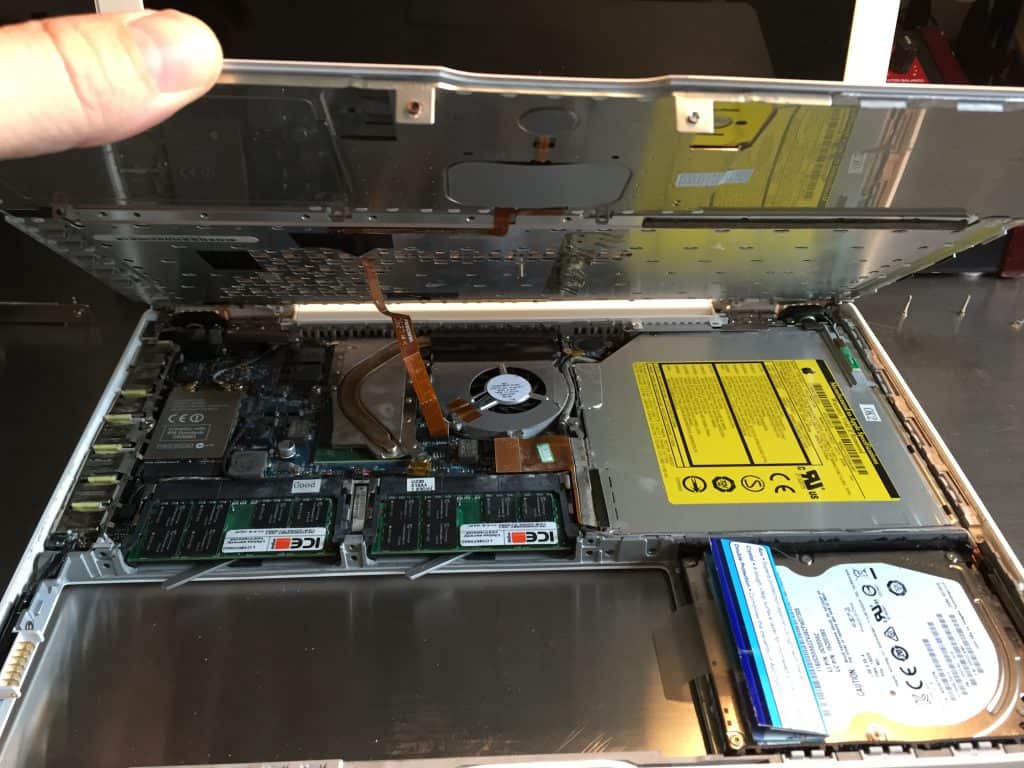
Removing all the screws and opening it up.
I surfed the web and found a $30 Hong Kong replacement on AliExpress.com. The description said it was original and 97% new, which I now understand means refurbished. I suspect they took the underside from an old laptop and added newly produced plastic top, keys and pad.
The quality of the top case was surprisingly good, although there is a barely noticeable bump in the plastic to the left of the pad. As if something like a spanner was dropped on it. Never mind.. I’m happy it doesn’t smell at all like the original, it’s in one piece and everything is working. And I now have a Windows 10 computer that looks like a Macbook.
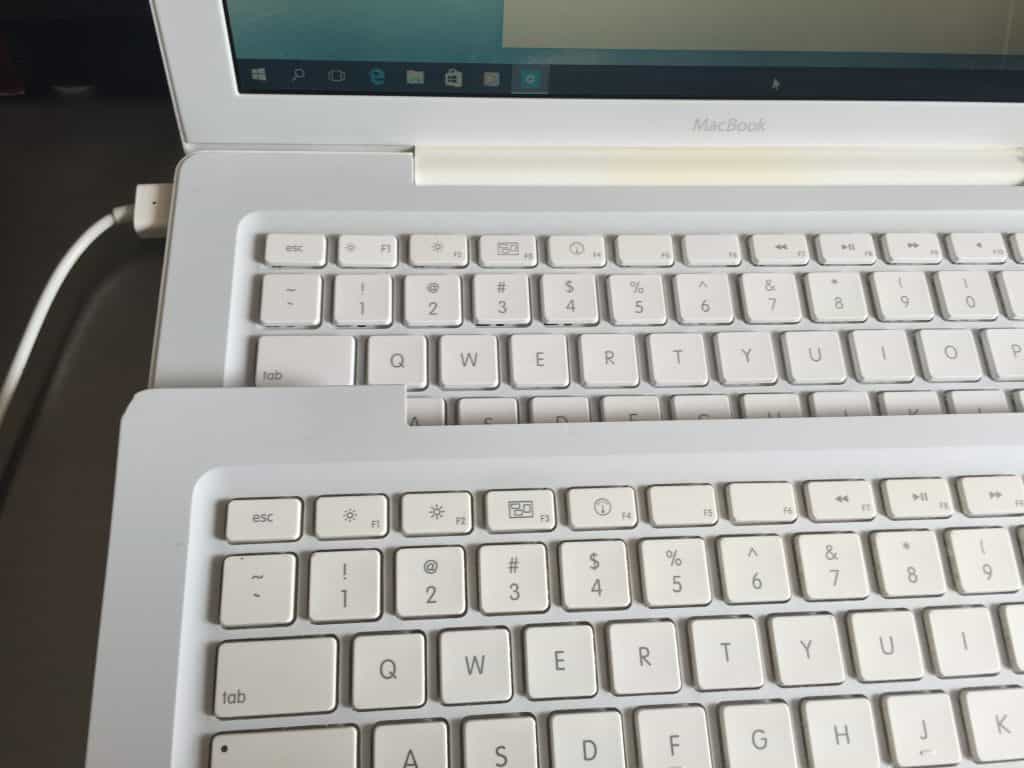
New vs old. Notice how the keys are a bit more yellow on the old top case.